
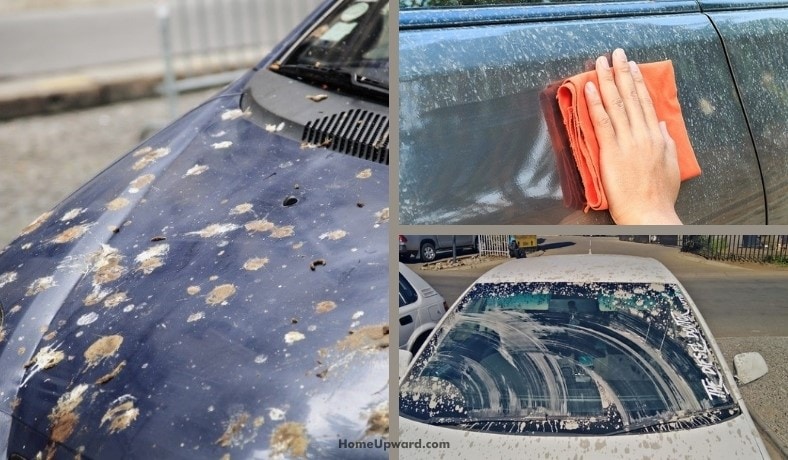
It’s really a shame, but no matter how careful you are when driving cement stains from construction sites or highway projects can happen!
The truth is that cement stains on your car’s paint and body can be tough to remove without scratching or damaging it.
With some simple homemade solutions, your car can look like new again. Read on to find out more!
Contents
How to remove cement stains from a car (steps and notes)
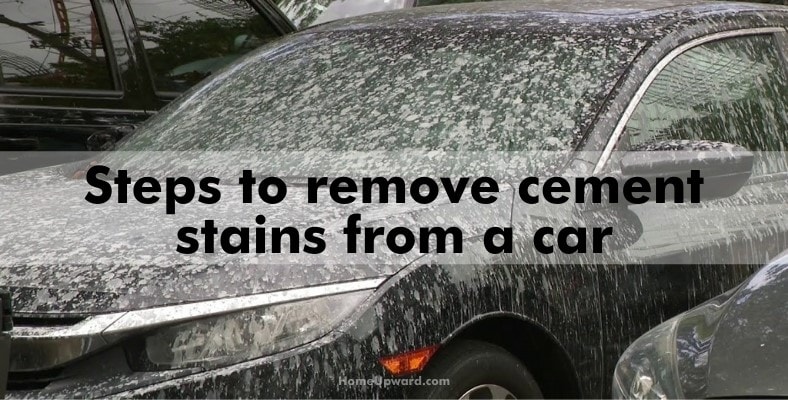
While it is possible to get rid of cement stains from paintwork, it will require time and patience, especially if you do not want to damage the car further.
The key to removing cement is to dissolve it with either a pre-made or homemade solution. We will discuss this further below.
A. Dissolving cement stains
Let’s begin the journey to get your car looking new again.
Step 1
Firstly, block off the area that surrounds the stain with masking tape. Simply attach 3 to 4 pieces of masking tape (also known as painter’s tape) on all sides of the stain.
This is in place to give you a safety net in case you overspray. Overspraying unmarked areas of your car with a cleaning solution can easily damage the paintwork and you’ll be left with even more work.
We don’t recommend using duct tape for this step as its strong stick nature can easily damage the car’s paint.
Moreover, if there are numerous stains on your car, tape around each one before moving to our next step.
Step 2
Next, you need to use a specialized cement dissolver to remove the stains. These dissolvers can usually be found at local hardware stores or online.
Therefore, it is environmentally friendly to use at all times. However, the cement must be less than 6 months old for this product to successfully dissolve into rinsable mud. As with any stain, the earlier you tackle it, the better chance you have at removing it once and for all.
Solutions, such as Korkay’s, dissolves calcium from the cement. This means the leftover stains can then be removed easily. The active ingredients of most commercial cement dissolvers contain an active ingredient that occurs naturally in sugar cane syrup so you can rest easy when using it out in the open or in your garage.
Step 3
As with many stain removing techniques, it’s time to get the vinegar out. This is the most affordable way of removing those pesky cement stains.
Simply fill a spray bottle almost to the top with half pure white vinegar. Top it off with a dash of lukewarm water. Close the lid and shake the contents of the bottle thoroughly for approximately 5 minutes. This is so the water and vinegar mix properly. The vinegar’s acidity will get to work dissolving the cement, making it easier to remove.
As we mentioned, using vinegar is a cheaper alternative to using a commercial cement dissolver but the results may not always be as good.
Vinegar is a great option if you find cement splashes over your windows or windshield. Simply spritz the mixture on the stains and wait for around 15 minutes. Then, wipe the vinegar solution away as well as the cement using a damp sponge. Repeat if traces of cement remain.
Step 4
Spray the solution directly onto the cement markings. This will help loosen them up making them easier to remove. Using the vinegar and water solution or the cement dissolver, saturate all the cement stains.
Allow the liquid to soak for around 1 minute and then spray the stain once again to loosen it further.
You may need to use a considerable amount of your solution on some stains but this is quite normal. You could also find that one spray bottle or a single container of cement dissolver will not be enough, especially if there are multiple cement stains over your car.
B. Wiping away the stains
Step 1
Once you have soaked the cement stains with the solution of your choice, it’s time to try and remove them once and for all.
Using a spatula that is covered by a cloth, begin by scraping away at the cement. We highly recommend using a wooden or plastic spatula as a metal type will more than likely damage your car’s paintwork.
Do not scrape too hard. Gently peel the cement and scrape from underneath. This should remove any parts of loose concrete that have been stuck to the car.
If the cement is a little stubborn, dig the covered spatula under the stains and wiggle it. Do this until you feel the concrete loosening up and start to fall off.
We suggest using old cloths and quite a few of them. For each cement stain, you should use a different cloth around the spatula. This gives you a better chance at eliminating the stain and not spreading marks elsewhere on the car’s bodywork.
Step 2
Next, you need to spray more solution onto the stains. Then, you should gently push your cloth against the cement stains.
Once larger pieces of cement have begun to fall off, it’s now time to work on those thinner layers. You will need some patience at this point as you have to remove them bit by bit.
Grab hold of your cement dissolving solution again and spray the stains once again. Push the cloth against these stains but this time, hold the cloth in place against the stains for a few minutes. This should start to dissolve the remaining thin layers of cement.
You can repeat this process as many times as you wish if the cement is refusing to move. Continue to do so until there are no stains left. As we said, you will need a lot of patience!
When you push up against the cement with your cloth, ensure that you do not rub against it. Doing this could potentially damage the paintwork of the vehicle and the stain will then become almost impossible to remove.
Step 3
Most of the cement should now have been removed. With the remaining grains, you need to start removing these with a clay bar.
Using a small amount of water, gently wet the stained area. You can also use the included lubricant before picking up the clay bar. Apply the putty-like material to the paintwork of your car with a gentle, circular motion. This should start to lift the fine particles and debris from your car’s surface.
Clay bars are available at your local auto shops, hardware stores, or home improvement stores. You can also purchase this set from Amazon. It can be safely used on paintwork, plastic, glass, and metal surfaces.
Step 4
Once the area is free of cement and clean, you need to wax the surface. Any car wax should suffice but we recommend Chemical Guys. This is safe for all finishes and will leave your car looking shiny and protect its paintwork from the elements too.
To apply wax, simply place a thumb-sized portion of wax onto a lint-free cloth. Gently rub the wax into your car’s paint with small, circular motions. You can use vertical or horizontal rows of circles to cover the entirety of your car’s surface if desired.
Just make sure you apply an even, thin layer. Once the wax is applied, buff it using circular motions. This is the act of leveling out the wax so it is even over all surfaces of your car’s exterior.
As well as online, car wax is available at your local auto shops and hardware stores. Just ensure that all the cement has been removed and the car is dry before applying any wax. If not, you could be left with an uneven surface and the wax won’t stick to the car properly.
Try using salt!
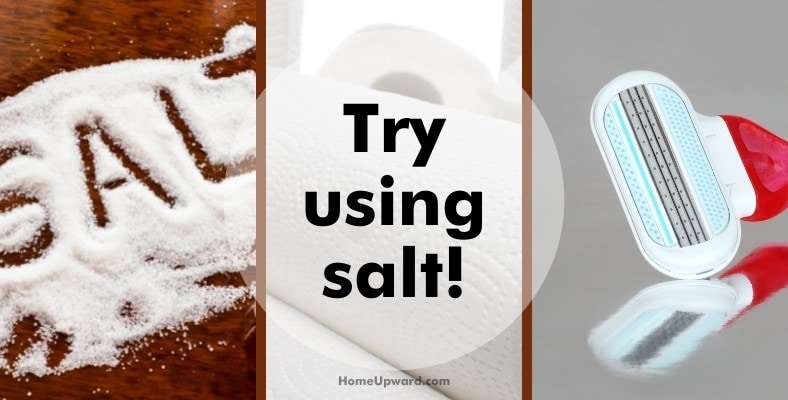
As well as using a cement dissolver or a vinegar/water solution, you can also try salt. For this approach, you need to do the following:
- Prepare a concentrated solution of salt and water
- Place paper towels into the solution and allow them to soak for a few minutes
- Place the soaked paper towels on the dried cement area and let them sit for 25 to 30 minutes
- Using a knife or a razor, very carefully scrape the cement away. This requires a delicate touch as you can easily scratch your car at this point
- If any leftover cement is still visible, add more solution and repeat the process until it is completely gone